Sliding doors are a gateway to a vibrant and inviting home offering fresh air and natural light. But, when the sliding aspect of your sliding door isn’t living up to its name, it’s time to get your door back in working order. Read on for steps to fix your sliding door issues.
Supplies Needed
Whether the wheels are misaligned or the track is in need of a good cleaning, getting the right supplies is crucial for a successful sliding glass door repair. Below is a list of the materials and tools you’ll need to get your sliding door frame back on track.
Materials
- Premium replacement screen door (optional)
- Replacement rollers (optional)
- Replacement weatherstripping (optional)
- Replacement screen (optional)
- Silicone lubricant or WD-40
- Paraffin wax
Tools
- 4-in-1 screwdriver
- Sawhorses
- Distilled white vinegar
- Hammer
- Putty knife
- Pliers
- Plastic adhesive
- Staple gun
- Allen wrench
- Corded drill
- Pry bar
- Rags
- Screen roller
- Utility knife
How to Fix A Sliding Glass Door
Armed with the necessary tools, let’s dive in. Follow these step-by-step instructions for a smooth and effective sliding glass door repair.
1. Lower the Door From the Track

The first step to adjusting your sliding glass door frame is to lower the door on the track with a screwdriver or Allen wrench. Locate the two adjusting screws positioned either at the bottom or side of the door. If there are trim caps covering the screws, carefully pry them off. Turn the screws counterclockwise until fully retracted. This retracts the rollers, lowering the door.
2. Remove Head Stop

Prepare an outdoor workspace with a pair of sawhorses equipped with protective pads. Clear any obstacles around your sliding glass doors and the sawhorse area. Open the door fully and proceed to remove the head stop, positioned at the top of the door, by loosening its screws. It’s crucial not to leave the door unattended during this step as it can fall without the head stop in place.
3. Remove Stop Molding

In some instances, you may need to take out the stop molding to free the door from its frame. If this is the case, start by unscrewing the fasteners securing the stop molding. For a clean removal, carefully cut along the paint or varnish line on the room side of the stop molding. It should come off smoothly. Again be cautious; with the stop molding removed, the door could fall if left unattended.
4. Lift the Door Out

Position yourself indoors and grasp the edges of the door. Tilt the door toward you and carefully lift it out of the track, focusing on one edge at a time. Given the weight and potential unwieldiness, having an extra set of hands is advisable. Set the door on sawhorses.
5. Inspect and Clean the Wheels

The primary culprit behind a stubborn glass sliding door frame is often dirt accumulation on the wheels or within the track. Once the door is off, thoroughly clean up the door rollers, also known as sliding glass door wheels. After cleaning, apply lubricant for smooth operation. However, if the wheels are beyond repair, remove them and replace them with new rollers. It’s important to note that most wheels are secured by the weight of the door, not screws. Take note of the manufacturer’s name on the old roller to help identify a compatible replacement at the hardware store.
6. Clean the Tracks

Now that the wheels are operating smoothly, focus on cleaning the tracks. Begin by wiping the head track, including the removed head stop, with alcohol. Follow this with WD-40 or silicone for lubrication. Next, thoroughly vacuum the bottom track and clean it with alcohol. Instead of using silicone to lubricate the bottom track, use a block of paraffin wax. Rub the wax on the track surface a few times for a lasting, friction-free glide.
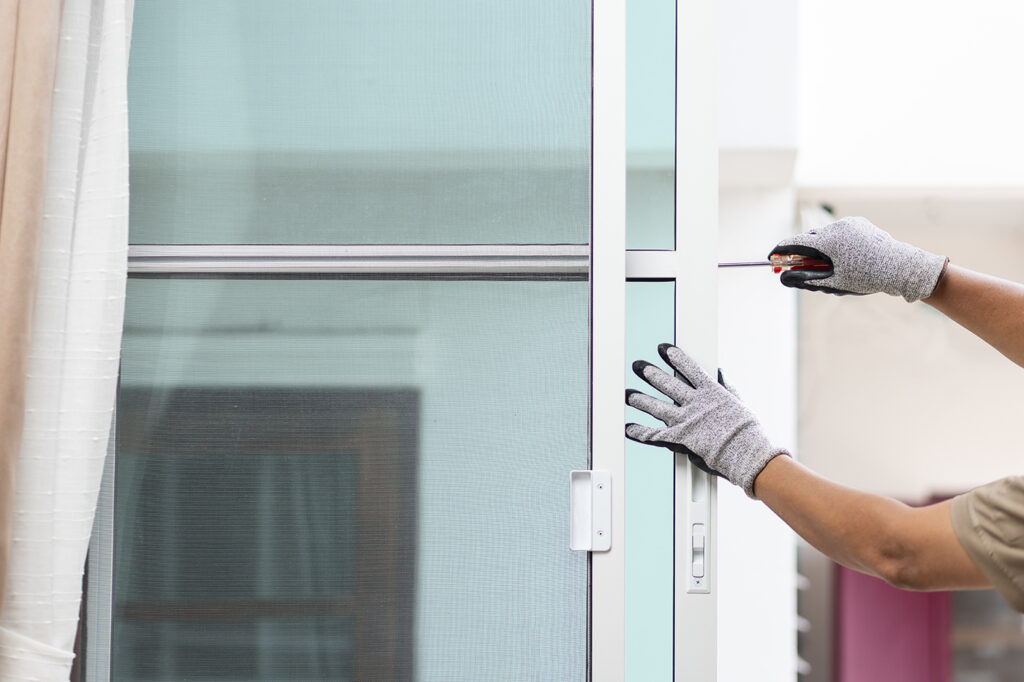
7. Replace Weatherstripping

Occasionally, the weatherstripping where the sliding and fixed panels overlap may need to be replaced. To do this, use a flathead screwdriver to loosen the weatherstripping. Grab one end and gently pull it, along with any staples, off the door, using a putty knife for added leverage. Remove any remaining staples with pliers, and sink broken ones with a hammer.
For the strip on the jamb side, which is typically glued on, carefully pull it off. Use a putty knife to scrape away adhesive, taking care not to damage the finish. Follow the instructions to orient the new weatherstripping correctly. Align the top with the shadow line of the head stop and securely fasten the flange along the door’s edge. Drill ⅛-inch-diameter pilot holes at each flange hole and drive in the provided screws. Repeat this process on the fixed panel so that the two strips interlock. Glue the jamb-side strip in place using a plastic adhesive. Any smudges can be cleaned with alcohol.
8. Repair the Screen

If your screen door is showing signs of sagging, wrinkles, or damage, remove the screen and place the door on a flat work surface, supporting each end with a 1×4 wood block. Clamp the middle of the door, creating a slight bow in the frame.
Next, attach a new screen to one end of the frame using staples or a rubber spline. Move to the opposite end, pull the screen snug and flat—avoiding excessive tension—and secure it in place. Release the clamps, allowing the screen to tighten as it straightens. Finally, secure the sides of the screen to the frame for a properly repaired screen door.
9. Reinstall the Door

Now that your door is clean and refreshed, carefully place it back onto the bottom track and tilt it upward. With the door securely braced against your body, reattach the head stop. Roll the door within a half-inch of the latch-side jamb and fine-tune its alignment by adjusting the roller screws until the door runs parallel to the jamb.
10. Evaluate Door Replacement

If your current screen door is consistently out of adjustment and the wheels are prone to breaking, it might be time for replacement. Opting for a premium door is a valuable upgrade, particularly if you’ve experienced persistent issues. While they may come at a slightly higher cost—usually only $20 more—than standard aluminum styles, premium doors are equipped with smoother-sliding wheels, providing enhanced durability and ease of use. Many companies offer convenient door delivery services, and premium doors often include pet-safe screen fabric, specifically designed to resist damage from claws.
Sliding Glass Door Repair FAQs
Is It Possible to Only Replace the Glass Panel?
Yes, it is possible to replace only the glass panel if your manufacturer still produces the specific panel you need. In case they no longer offer the exact match, work with your manufacturer to find a corresponding model. Swapping out the sliding or stationary side with a new panel is a straightforward process.
Why Is My Sliding Door Hard to Open and Close?
Debris build-up is the most common cause for a sliding door frame that refuses to glide. Dust, mud, hair, grime, and fur can collect in the track groove and clog the rollers beneath the doors, causing door sticking. Sometimes you can clean the track without needing to remove the door.
Why Is My Sliding Door Not Closing All the Way?
Misaligned tracks can be the cause of a door that doesn’t close all the way. You can try to re-align the door without taking it off the tracks. Simply push the door far enough that both sides are grabbable, then pick the door straight up. You should be able to position it back where it belongs.
DIY Vs. Hiring a Tasker
Dealing with a malfunctioning glass sliding door is not just an inconvenience; it can also pose a safety hazard. Restore your glass door with the assistance of Taskers. A local Tasker in your neighborhood can handle a variety of door repairs, whether it’s installing storm doors, adjusting garage doors, or even hanging a mirror on your bedroom door. Whatever the repair needs may be, Taskers are equipped with the right tools to see it through.