
Picture this: Sunlight dappling through the trees outside, a gentle breeze blowing through the living room window, and you nestled deep within a cozy, swinging chair suspended from the ceiling. Hanging chairs are more than just furniture; they’re portals to peaceful afternoons, serene reading sessions, and playful moments with loved ones. But before you can enjoy this gentle home improvement, there’s one crucial step: secure installation.
Learning how to hang a chair from your ceiling might seem daunting, but fear not! This comprehensive step-by-step guide will take you from ceiling novice to swinging pro, complete with unique tips and insights to ensure a flawless, stress-free process. So, grab your tools, channel your handy skills, and get ready to elevate your lounging experience to new heights!
Safety Considerations Before Beginning
While the process of discovering how to hang a chair from your ceiling is exciting, safety always reigns supreme. This project can happen indoors or outdoors on your patio, but before taking a drill to your ceiling joists, remember these crucial points:
- Weight capacity: Hanging chairs, patio swing chairs, and hammock chairs are meant for gentle swaying, not gravity-defying acrobatics. Check the chair’s weight limit, and ensure it can comfortably support your intended use. Remember to factor in the weight of the occupants and any accessories like cushions or blankets.
- Ceiling structure: Not all ceilings are created equal. Forget fragile drywall; your anchor needs the sturdy embrace of a ceiling joist. Use a stud finder to locate these hidden beams and mark their location for later drilling.
- Hardware strength: Don’t skimp on hanging hardware! Opt for heavy-duty lag screws, eye bolts/eye hooks, or brackets specifically designed for ceiling suspension. Remember, your chair’s safety, and potentially your safety, depend on these anchors holding firm.
- Knot knowledge: If using rope instead of chains, ensure your knot-tying skills are on point. Practice secure knots like the bowline or double figure-eight before trusting them with your hanging chair, patio swing chair, or hammock chair.
- Testing and vigilance: Once installed, never skip a thorough test run! Sit, sway, and even gently bounce to ensure the chair feels stable and secure. Regularly check the hardware and rope for signs of wear or strain, and promptly address any concerns.
By prioritizing safety, you can transform your hanging chair installation project from a nail-biting endeavor to a satisfying DIY feat. Now, armed with a healthy dose of caution, let’s dive into the project overview!
Project Overview
Before embarking on your hanging chair installation, prepare yourself with a realistic understanding of the project’s scope:
- Estimated Time: This project can take anywhere from 1-3 hours, depending on your DIY skill level, the ceiling structure, and any unforeseen surprises. Allot additional time if you’re planning intricate rope work or need to assemble a pre-purchased chair.
- Cost: The primary cost contributors are hardware and any additional tools you might need. Heavy-duty hardware can range from $10-50, while tools like drills or stud finders might require a rental or purchase depending on your existing toolbox. Remember, quality hardware is an investment in safety and shouldn’t be skimped on.
- Expertise Level: Consider yourself a handyperson-in-training? This project falls somewhere between beginner and intermediate, depending on your comfort level with basic tools and following instructions. If meticulous knot-tying or ceiling modifications are involved, consider enlisting the help of a skilled Tasker for a smooth, worry-free installation.
Now that you have a clear picture of the project’s demands, gather your supplies, and prepare to transform your ceiling into a launchpad for serene relaxation!
Supplies Needed

Before you start installing your hanging chair, ensure you have these tools and materials:
Materials
- Hanging chair: Choose a type of chair with a weight capacity exceeding the intended use and appropriate mounting hardware. Popular options include hammock chairs, papasan swings, and bubble chairs.
- Ceiling joist finder: Locating those hidden beams is crucial for secure installation.
- Heavy-duty lag screws or eyebolts: Depending on your chosen mounting method, opt for high-quality, weight-rated hardware.
- Drill: A reliable drill with appropriate drill bits is essential for making pilot holes and securing hardware.
- Socket wrench or screwdriver: Tightening those lag screws, eyebolts, or eye hooks requires the right tool.
- Level: Ensuring your chair hangs straight is key to a serene swaying experience.
- Tape measure: Precise measurements are essential when hanging a chair from your ceiling.
- Pencil or marker: Marking drill points and hardware placement keeps your project organized.
- Safety glasses and gloves: Protect your eyes and hands while drilling and handling hardware.
- Chain or rope (optional): Some chairs require additional suspension elements. Choose high-strength materials suitable for the chair’s weight.
- Carabiners (optional): If you’re using chains or ropes when hanging a chair from your ceiling, carabiners provide secure connection points.
Tools
- Ladder: Installing your swing chair will require a sturdy and stable platform.
- Stud finder: Double-check those joist locations for maximum peace of mind.
- Pliers: You may need these to grip and turn screws or hooks.
- Wire cutters (optional): If using rope, trimming excess ends requires a clean cut.
- Hammock hooks (optional): Some chairs that hang from ceilings use specific hooks for attachment.
Pro tip: Remember, quality matters! Don’t settle for flimsy hardware or a cheaply built hanging chair. Investing in durable materials ensures a safe and long-lasting setup.
With your toolkit assembled and safety precautions in mind, you’re ready to embark on the most exciting part: the installation itself!
How To Install A Hanging Chair From The Ceiling?
Now that you’re armed with the knowledge and necessary supplies, it’s time to put your ceiling to work. Follow these steps to ensure a smooth and secure installation:
1. Locate The Joist, And Mark The Hanging Location

- Your hanging chair needs a sturdy foundation. Grab your trusty stud finder, and locate a ceiling joist where you want your chair to hang. Remember, weight capacity is crucial, so choose a joist that can comfortably support the chair and its occupants.
- Mark the center of the joist with a pencil. This will be your anchor point for the hanging hardware.
Pro tip: Can’t find a single joist where you need it? Don’t fret! Taskers recommend installing a ceiling anchor plate specifically designed for distributing weight across multiple joists.
2. Drill Pilot Holes

- Before driving lag screws or eye bolts into your ceiling, create precise pilot holes using a drill bit slightly smaller than the screw diameter. This prevents cracks and ensures a smooth, secure installation.
- Drill your pilot holes straight through the marked point on the ceiling and into the joist below.
3. Install Hanging Hardware

- Screw in your chosen hardware, be it lag screws or eyebolts, using your drill and socket wrench. Ensure they’re firmly embedded in the joist, leaving no room for wobbling or wiggle room.
- Remember, a level is your friend! Double-check that your hardware is perfectly straight to avoid a lopsided swinging experience.
Feeling unsure about your drilling skills? Don’t be afraid to call in a Tasker! Their expertise will ensure your chair hangs like a dream, not a lopsided nightmare.
4. Attach Chair To Rope (Optional)
- If your chair doesn’t come with its own suspension system, you’ll need to attach it to the hardware using a chain or rope. Choose high-strength materials with a weight capacity exceeding the chair’s maximum load.
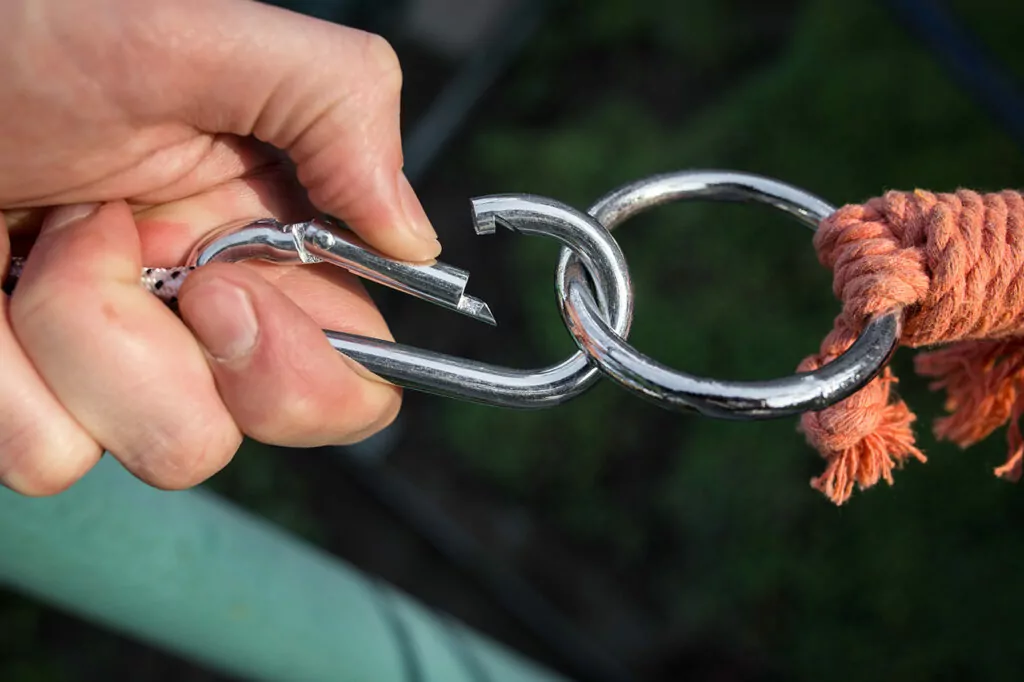
- Securely tie a strong knot, like a bowline or double figure-eight, at the end of the rope or chain. Clip the other end to a carabiner, and then hook it onto the eye hook.
5. Hang The Chair

- Gently lift the chair, and attach its hanging ring or eye hooks to the carabiner or other designated connection point. Double-check all knots and connections for tightness and security.
- Test the chair by gently sitting and swaying. Check for any creaking, wobbling, or instability. If anything feels off, adjust the hardware or knots and retest before settling in for a blissful swing.
6. Celebrate And Relax (Safely)

- You did it! Sit back, relax, and enjoy the fruits of your labor. Remember, safety first! Avoid exceeding the weight limit, monitor the hardware and rope for wear, and never let unsupervised children near your hanging chair.
When to Replace a Hanging Chair

While some chairs that hang from ceilings can swing happily for years, time and use eventually take their toll. So, when is it time to bid farewell to your beloved hanging chair and invest in a new one?
Generally, replace your swing chair every 5-7 years, even if it appears undamaged. Sun exposure, weight stress, and constant swaying can weaken materials and compromise safety. Consider these additional factors:
- Visible wear and tear: Rips, fraying, and loose stitching on fabric chairs are red flags. Rust or corrosion on metal components also signals it’s time for an upgrade.
- Creaking or instability: Does your chair sing an ominous tune every time you settle in? Creaking or excessive movement indicates weakened materials or damaged hardware. Play it safe, and replace it.
- Exceeded weight limit: If you’ve regularly pushed the weight limit, even slightly, it’s time to retire the chair before a potentially dangerous mishap.
- Peace of mind: Sometimes, it’s just about feeling secure. If you have any nagging doubts about your chair’s safety, err on the side of caution, and get a new one.
Remember, your safety and that of your loved ones is paramount. Don’t wait for disaster to strike— replace or repair your chair at the first hint of trouble.
How to Keep Your Swing Chair from Spinning: Tame the Twirl

Who doesn’t love a gentle sway? But uncontrolled spinning can turn a relaxing swing into a dizzying frenzy. Here’s how to keep your chair spin-free:
- Balance the weight: Ensure your chair is evenly balanced by adjusting cushions or blankets. Uneven weight distribution can trigger unwanted spins.
- Reduce friction: Check for any points of contact between the chair and ceiling or surrounding objects. Lubricate them lightly to minimize friction and unwanted rotations.
- Install a swivel stopper: These nifty contraptions attach to the chain or rope and prevent the chair from spinning completely. Many hardware stores or online retailers carry them.
- Embrace the twirl: Sometimes, spinning can be fun! If you enjoy the occasional whirl, simply sit back, relax, and let the momentum carry you away. Just remember to hold on tight!
With these tips, you can banish unwanted spins and ensure your swing chair remains a haven for peaceful relaxation.
Need Help Mounting?
Mounting a hanging chair is a rewarding feat, but sometimes, life throws you curveballs like tricky ceilings, knot-tying woes, or simply a lack of time. That’s where Taskrabbit comes in! Taskers are masters of ceiling transformations, and they’re equipped with the tools, knowledge, and expertise to install your hanging chair flawlessly (and clean it once it gets dirty). Forget the DIY stress and book a Tasker today—your serene, swinging sanctuary awaits!