How to Clean Prefinished Hardwood Floors
Prefinished hardwood floors are a simple luxury for any home, offering timeless elegance and durability. But regular cleaning and maintenance are essential to maintain their luster and longevity! In this blog post, you’ll learn the intricacies of cleaning prefinished hardwood floors and get tips for cleaning them and keeping them pristine for years to come.
Cleaning Steps for Prefinished Hardwood Floors
Hardwood floor care doesn’t have to be overwhelming! Here are eight steps to cleaning wood floors, whether you just finished sanding them and want to understand the proper cleaning techniques, or you’re trying to up your overall hardwood floor care game.
1. Consult Manufacturer Guidelines
Always refer to the manufacturer’s guidelines and recommendations for cleaning and maintaining your particular prefinished hardwood flooring before you begin cleaning or invest in cleaning products.
2. Sweep or Dry-Mop Daily
Remove loose dirt, dust, and debris from the floor using a soft-bristled broom or a dust mop. Soft-bristle cleaning prevents abrasive particles from scratching the wood surface during subsequent cleaning steps.
3. Vacuum Floors
Use a vacuum cleaner with a soft brush attachment to remove finer particles and debris from hard-to-reach areas, corners, and edges. Ensure the vacuum cleaner is set to the appropriate setting to avoid scratching the floor. Avoid using a beater bar—the rotating brush on your vacuum—as this can scuff hardwood floors.
4. Avoid Using Water
Prefinished hardwood floors are sensitive to moisture, so avoiding excessive water or harsh cleaning solutions is crucial. Instead, the best way to clean prefinished hardwood floors is to opt for specialized hardwood floor cleaners designed for prefinished surfaces. If you ever use water, make sure you only use a damp cloth or mop as outlined below.
5. Damp Mop Occasionally
For deeper cleaning when you need to get rid of dirt and grime or you’re doing a move-out clean, mopping hardwood floors is an option. Lightly dampen a microfiber mop, or use a damp cloth with a diluted hardwood floor cleaner or a manufacturer-recommended solution. Wring out extra water before using it to prevent excess moisture from seeping into the wood joints and causing damage. Wet mopping is not recommended.
6. Clean Spills Promptly
Promptly clean accidental spills using an absorbent, clean cloth. Avoid letting liquids sit on the floor for an extended period, as they can penetrate the wood finish and cause stains or warping.
7. Use Furniture Protectors
Place felt pads or coasters under furniture legs to prevent scratches and dents on the hardwood surface. Regularly check and replace these protectors as needed to maintain their effectiveness.
8. Reapply Finish as Needed
Over time, the protective finish on prefinished hardwood floors may wear down. Monitor the condition of the finish and go through the process of refinishing when necessary to maintain the floor’s appearance and protection. Polyurethane is an example of a popular hardwood floor finish.
How to Maintain Prefinished Hardwood Floors
Maintaining prefinished hardwood floors is essential to ensure their longevity and aesthetic appeal. As mentioned earlier, one of the most crucial aspects of maintenance is to establish a regular cleaning routine. Beyond cleaning, minimizing wear and tear on the floor’s surface is important. You can place rugs or mats in high-traffic areas, such as entryways and hallways, to reduce the impact of foot traffic and prevent scratches. Additionally, using furniture protectors, such as felt pads or coasters, under the legs of chairs, tables, and other furniture items can prevent scratches and dents caused by movement.
To prevent damage, homeowners should also:
Avoid High Heels and Sharp Objects
Encourage household members to remove high heels, sports cleats, and other sharp objects before walking on the hardwood floors to prevent scratches and gouges. You can add a door mat in front of your room’s entrance to help as well.
Trim Pet Nails Regularly
Keep your pets’ nails trimmed to minimize scratches on the hardwood surface. Additionally, place area rugs or mats in high-traffic areas and pet resting spots to protect the floors further.
Maintaining a consistent indoor environment can also help preserve the condition of prefinished hardwood floors. Fluctuations in humidity and temperature can cause the wood to expand or contract, leading to gaps between the floorboards or even warping. It’s best to keep the indoor humidity levels between 35% and 55% and to avoid exposing the floors to extreme temperature changes. Finally, periodic inspection of the floors for signs of wear, scratches, or damage is essential.
Products for Prefinished Hardwood Floors
While baking soda or bleach may be suitable cleaning solutions for other areas of your home, they’re the last thing you’ll want to use on your precious hardwood floors, as they can cause damage. Avoid harsh chemicals, abrasive cleaners, or excessive water, as these can strip the finish and damage the wood. Additionally, steer clear of steam cleaners, wax-based cleaners, and oil soaps since they can leave behind residue and dull the floor’s finish over time. They also can make floors insanely slippery and cause dangerous falls!
Instead, opt for specialized hardwood floor cleaners that clean without leaving residue or causing damage. Microfiber cloth mops and soft-bristled brooms are ideal for daily cleaning, as they effectively remove dirt and debris without scratching the wood surface.
Cleaning Hardwood Floors FAQ
What cleaner to use on prefinished hardwood floors?
It’s best to use a pH-neutral hardwood floor cleaner specifically formulated for prefinished hardwood floors. Avoid using harsh chemicals, ammonia, vinegar, or abrasive cleaners as they can damage the finish and dull the appearance of the floor. Always follow the manufacturer’s recommendations for cleaning products.
What is the best way to clean finished hardwood floors?
The best way to clean finished hardwood floors is to sweep or vacuum regularly to remove dust and debris. For regular cleaning, use a microfiber mop lightly dampened with water or a hardwood floor cleaner. Avoid using excessive water or soaking the floor, as water can damage the wood and finish. Wipe up spills immediately to prevent damage to the finish.
How do you make prefinished hardwood floors shine?
To make prefinished hardwood floors shine, you can use a hardwood floor polish or wax specifically designed for prefinished floors. Follow the manufacturer’s instructions carefully, as some products may require buffing or multiple coats for best results. Additionally, regularly cleaning and maintaining the floor can help restore its shine over time.
Can you damp mop prefinished hardwood floors?
Yes, you can damp mop prefinished hardwood floors, but it’s important to use minimal water to avoid damaging the wood and finish. Use a well-wrung mop or a microfiber mop lightly dampened with water or a hardwood floor cleaner. Avoid soaking the floor or leaving standing water, as this can cause warping, swelling, or damage to the finish. Always dry the floor thoroughly after damp mopping to prevent water damage.
Hire a Tasker!
Maintaining prefinished hardwood floors requires time, effort, and the right tools and products. If you need help cleaning hardwood floors without the hassle, Taskers can provide Cleaning services tailored to your specific needs and preferences. Whether you need a one-time deep clean to restore the luster of your prefinished hardwood floors or regular maintenance to keep your floors looking their best, Taskers can get the job done! With Taskrabbit, finding reliable and trustworthy cleaning is convenient and hassle-free. Simply specify your requirements, choose a Tasker with the right skills and experience, and enjoy the peace of mind of knowing that your prefinished hardwood floors are in good hands. Say goodbye to the stress of cleaning and hello to beautifully maintained floors!
DIY Tile Cleaning: How to Clean Your Kitchen and Bathroom Tiles
Sparkling clean tiles can transform the look of your kitchen and bathroom, making these essential spaces feel fresh and inviting. Whether you’re dealing with stubborn grout stains or just want to maintain the shine of your tiles, read on to discover the best ways to clean your kitchen or bathroom tiles. We’ll provide practical tile cleaning tips and expert advice to help you achieve professional-level results. Let’s dive in and get those tiles gleaming!
Know Your Surface Before You Scrub
Before you start cleaning, it’s important to identify the type of tiles you have. Different materials require different cleaning approaches:
1. Ceramic and porcelain tiles:
These are the most common and easiest to clean.
2. Natural stone tiles (marble, granite, slate):
These require more gentle cleaning methods.
3. Glass tiles:
Glass tiles are delicate and need special care.
Once you’ve identified your tile type, you can proceed with the appropriate cleaning method.
The Clean Team: Assembling Your Tile-Cleaning Arsenal
Gather these supplies before you begin:
- Microfiber mop or soft cloth
- Bucket
- Warm water
- Mild dish soap or pH-neutral cleaner
- White vinegar
- Baking soda
- Old toothbrush or grout brush
- Spray bottle
- Squeegee (for shower tiles)
Sparkling Surfaces: Your Step-by-Step Tile Transformation
Follow these steps for routine cleaning of ceramic or porcelain tiles:
- Sweep or vacuum the floor to remove loose dirt and debris.
- Mix warm water with a small amount of mild dish soap in a bucket.
- Dip a microfiber mop or soft cloth into the solution and wring out excess water.
- Mop the tiles in a circular motion, working in small sections.
- Rinse the mop frequently in clean water to avoid spreading dirt.
- For stubborn stains, let the soapy water sit on the tile for a few minutes before scrubbing gently.
- Rinse the entire floor with clean water to remove any soap residue.
- Dry the floor with a clean towel or microfiber cloth to prevent water spots.
Cleaning Grout: Winning the War on Grime
Grout lines and dirt can be challenging to clean, but with the right method, you can restore them to their former glory.
- Mix equal parts water and white vinegar in a spray bottle.
- Spray the solution onto the grout lines and let it sit for 5-10 minutes.
- Scrub the grout with an old toothbrush or grout brush.
- For tougher stains, make a paste with baking soda and water.
- Apply the paste to the grout and let it sit for 10-15 minutes.
- Scrub the grout lines and rinse thoroughly with clean water.
- Dry the area with a clean cloth.
Stone Savvy: Pampering Precious Surfaces
For natural stone tiles, avoid acidic cleaners like vinegar. Instead:
- Use a pH-neutral cleaner specifically designed for natural stone.
- Apply the cleaner with a soft cloth or mop, avoiding abrasive materials.
- Rinse thoroughly with clean water to prevent residue buildup.
- Dry the surface immediately with a soft cloth to avoid water spots.
Crystal Clear: Gleaming Glass Tiles
Glass tiles require gentle cleaning to maintain their shine:
- Use a non-abrasive, ammonia-free glass cleaner.
- Spray the cleaner onto a soft cloth rather than directly on the tiles.
- Wipe the tiles gently, paying attention to any streaks.
- Rinse with clean water and dry with a lint-free cloth.
Shower Power: Battling Bathroom Buildup
Shower tiles need extra attention due to constant moisture exposure:
- After each shower, use a squeegee to remove excess water from the tiles.
- Keep the bathroom well-ventilated to reduce moisture and prevent mold growth.
- For weekly cleaning, use a mixture of equal parts white vinegar and water (for non-stone tiles).
- Spray the solution on the tiles and let it sit for 5-10 minutes.
- Scrub gently with a soft brush and rinse thoroughly.
- For stone shower tiles, use a pH-neutral stone cleaner instead of vinegar.
Preventative Tips for Pristine Tiles
Maintain your tiles’ cleanliness with these preventive measures:
- Wipe up spills immediately to prevent staining.
- Use doormats at entrances to reduce dirt tracked onto tile floors.
- Apply a penetrating sealer to grout lines annually to repel stains.
- Consider using a daily shower spray to keep bathroom tiles clean between deep cleans.
- Avoid using abrasive cleaners or steel wool, which can scratch tile surfaces.
SOS (Save Our Surfaces): When to Call in Help
While regular maintenance can keep your tiles looking great, sometimes you need expert help. Some examples include:
- Deep-set stains that won’t budge with DIY methods.
- Large areas of discolored or moldy grout.
- Cracked or damaged tiles that need replacement.
- When you’re short on time or energy for a thorough cleaning.
This is where Taskers can come to your rescue! Hiring a Tasker for your tile cleaning needs can save you time and provide a top-notch result. Taskers can handle everything from routine cleaning to tackling stubborn stains that have been bothering you for months.
Tile Cleaning Taskers at Your Service
Taskers offer specialized tile cleaning services that can transform your kitchen and bathroom:
1. Deep Cleaning:
Taskers use professional-grade equipment and cleaning solutions to remove deep-set dirt and grime from your tiles and grout.
2. Grout Restoration:
Expert Taskers can restore discolored or moldy grout, bringing it back to its original color and condition.
3. Tile Sealing:
After cleaning, Taskers can apply sealants to your tiles and grout, protecting them from future stains and making them easier to maintain.
4. Custom Cleaning Plans:
Taskers can create a personalized cleaning plan for your specific tile types and problem areas for optimal results.
5. Regular Maintenance:
Schedule recurring appointments with Taskers to keep your tiles in top condition year-round.
By delegating getting help with tile cleaning from skilled Taskers, you can maintain pristine tiles without the hassle and time investment of doing it yourself. Whether you need a one-time deep clean or regular maintenance, Taskers have the expertise to keep your tiles looking their best!
How to Clean Carpet
If you’ve been wondering how to clean a carpet or a rug, you aren’t the first. It’s a rare house that doesn’t have some type of carpet or rug, and unless you’re the cleanest person alive, it’s likely that you’ll eventually need to clean them.
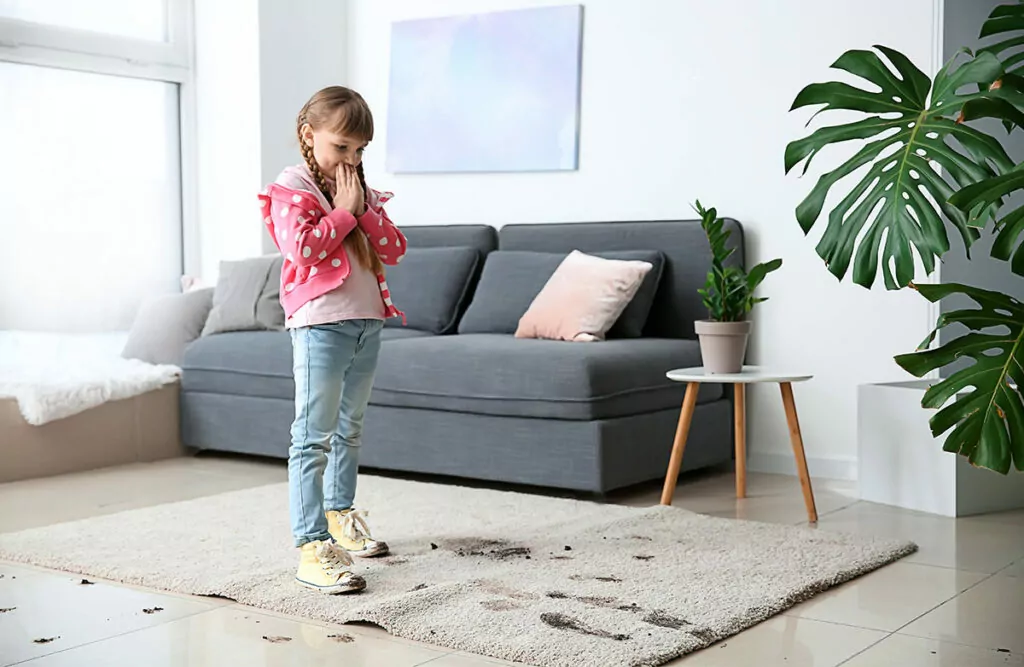
Carpets and rugs easily collect dust and crumbs, but sometimes, they become unfortunate targets for liquid spills, kid- and pet-related messes, and tough-to-remove stains. Whether you’re trying to get food, paint, blood, urine, or some other type of slime out of your carpet or rug, you definitely have multiple options.
The cost of carpet cleaning can be substantially lower when you DIY, but if you’re going to do it, make sure you follow the best methods for your particular stain.
Tools Needed For Carpet Cleaning
There are some essential tools for carpet cleaning, including:
- Vacuum
- Carpet Cleaning Solution
- Defoamers
- Air Scrubbers
- Stain Removers
- Carpet Rakes
How to Clean a Carpet in 6 Easy Steps
Now that you know all the different tools, solutions, and machines available for carpet cleaning, it’s time to get to work. If you’re wondering how to clean a rug also, realize that the below strategies can be adjusted or repeated for that situation.
- Move furniture (if necessary). Sometimes, a nasty spill might trail under your furniture. If this is the case, move the furniture so you have enough space to clean your dirtied carpet or rug.
- Clean up the initial mess. When something initially spills onto your carpet—whether it’s paint, your kid’s toy Slime, or a broken pen’s ink—you’ll have to first clean up whatever you can. This might mean picking up solid (yet potentially staining) bits by hand or using old rags to sop up liquids. Depending on what made the mess, you may want to run your vacuum over the dirtied spot to make sure you’ve cleaned up as many of the removable elements as possible.
- Test your spot cleaner. Before using any product on your rug, make sure to test it in a hidden area of the room. If you’re using a new product, it’s always best to make sure it doesn’t negatively affect your carpet or rug before you use it in a prominent area of the room.
- Pre-treat with spot cleaner. If you catch a mess quickly enough, you may be able to prevent a stain by immediately applying spot cleaner, letting it sit, and thoroughly wiping or blotting the area. If you’re unsure how to clean carpet by hand, just follow the instructions on the spot cleaner’s packaging. Repeat as needed until the stain goes away, or move on to the final step.
- Shampoo or steam clean. While most experts prefer steam cleaning to shampooing, either one can be your last step when it comes to DIY carpet cleaning. Make sure to follow the directions on whatever machine you’re using, and make sure as much moisture as possible is vacuumed off the carpet before you let it dry.
- Move the furniture back into place. Once your carpet is clean, let it dry thoroughly before moving any relocated furniture back into place.
How to Steam Clean a Carpet or Rug
If you don’t already own a steam cleaner, the prospect of using one can feel intimidating. While steam cleaners do have a suction component, they’re not the same as vacuums, so it’s important to know the difference. They’re also quite similar to shampooers these days, so depending on your machine’s instructions, you might be able to repeat the below steps for shampooing.
- Pre-treat the stain you want to clean. Most steam cleaning techniques start with pre-treating the affected area. Spray the cleaning solution on the stain, and let it sit for as long as directed before blotting it up with an old rag.
- Fill the steam cleaner’s tanks. Typically, steam cleaners have a tank for hot water, another for detergent, and a third for dirty water. Make sure to follow the manufacturer’s instructions for filling both of these tanks. Note that some also may require a defoaming agent, which can help prevent dirty water from overflowing onto your carpet. If you want a 100% natural alternative to detergent, you could also try mixing half water with half white vinegar.
- Begin steam cleaning. Using long, slow pushes and pulls, run the steam cleaner over your carpet. Like many similar shampooing machines, steam cleaners may require you to press a button to activate the vacuum portion, which sucks up the dirty water containing the loosened dirt or stains. Be sure to check the manufacturer’s instructions!
- No, really—move slowly! This is not your traditional vacuum. Because steam cleaners require time to break up heavy stains and suck up the resulting mix of water, detergent, and dirty water, take one step roughly every two seconds when performing the clean.
- Let your carpet try thoroughly. After vacuuming up as much moisture as possible, let your carpet dry thoroughly. Keep the floor clear of all objects, and keep shoes off of it. You can also set up box fans, switch on ceiling fans, or open windows to help the area dry faster. This will help prevent mold and mildew.

As you can see, there are many things to consider when removing stains from a carpet. The good news? If you’re also wondering how to remove odors from carpet, most of the above methods will take care of that, given that odors typically arise from spills, stains, and years of wear and tear. If you treat your carpet or rugs well, they can and should last for many years.


