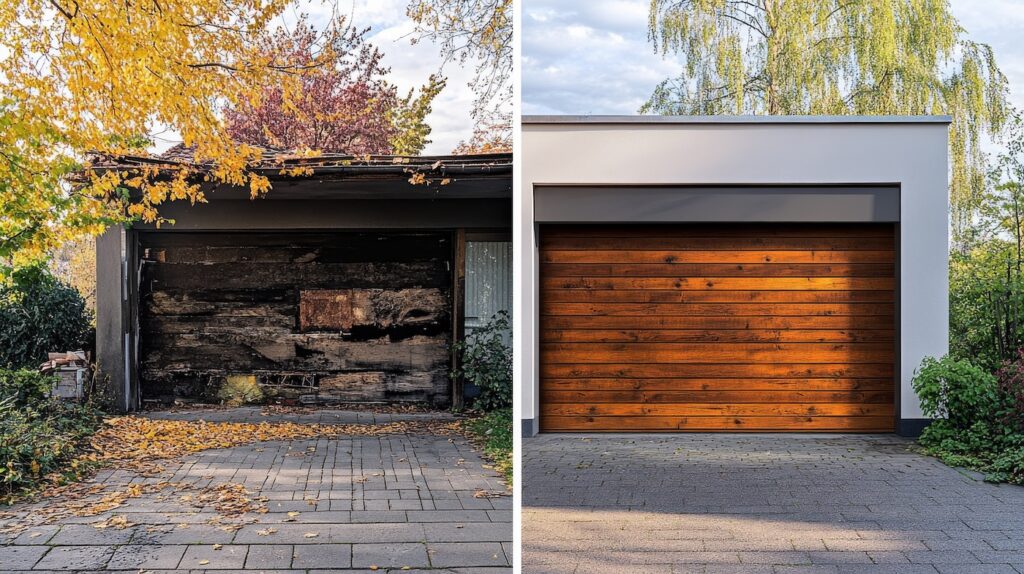
Wooden furniture and accents can be some of the most eye-catching features in a home. If you’re lucky enough to have wood, you’ll want to keep it looking great for years to come. One way to keep wood up to par is by waterproofing it. Failure to waterproof wood means you could end up with all sorts of issues like warping, cracking, discoloration, scratches, and even pests or mold. Read on to find out how to make wood waterproof.
4 Wood Waterproofing Methods
There are a variety of methods for how to protect wood from water and the pros and cons of each are broken down below.
Wood Oils

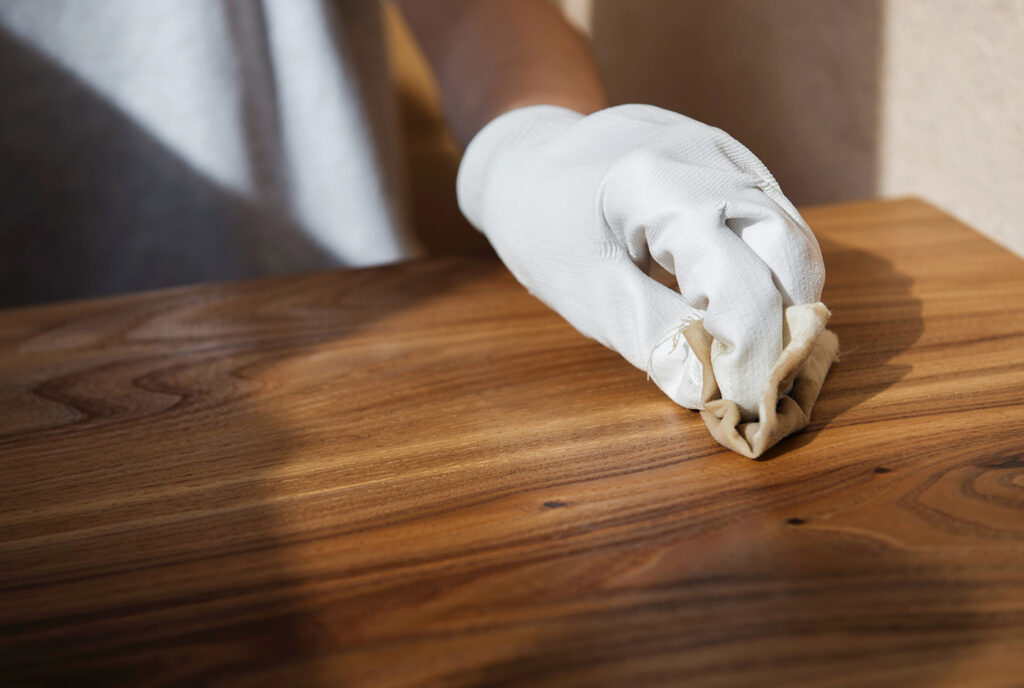
Wood oil has a long history of protecting wood, dating back centuries. It seeps into the wood, creating a barrier against water and restoring its natural oils. There are several types of wood oils available, including linseed oil, tung oil, and danish oil (a mix of linseed and tung oils). These options are safe for use around plants, animals, and children since they don’t contain harsh chemicals.
Additionally, wood oil preserves the wood’s natural texture and appearance, so even after treatment, the wood retains its original feel. Wood oil dries quickly and is usually applied by rubbing the oil into the wood. However, wood oil can gradually yellow lighter woods like pine or ash, so it’s better suited for darker woods.
For maintenance, wood treated with oil should be re-treated every six months to a year. While wood oils are ideal for protecting and revitalizing decorative items, they may not be the best choice for high-traffic areas such as dining tables and countertops.
Sealant

Sealant is a popular choice for waterproofing wood, offering long-lasting protection by forming a waterproof barrier on the wood’s surface. Sealant is one of the closest options for how to permanently waterproof wood. Unlike oil, sealants provide both strength and protection. However, some types of sealants do not protect against UV rays and may not be safe around children or pets.
Sealant is particularly well-suited for high-traffic indoor wooden surfaces such as countertops, doors, trims, and even shiplap or wood flooring. It comes in various forms such as lacquer, varnish, or polyurethane, each with different drying times.
Polyurethane, for example, requires three coats and can take up to three days to dry. It is favored for its ease of use and resistance to yellowing, available in both water and oil-based options. Lacquer provides a rich tone to wood but tends to yellow over time. On the other hand, varnish offers a shell-like finish that does not yellow and is a great option for how to waterproof wood furniture for outdoors as it filters UV rays.
Stain and Sealer

A combination stain and sealant is an effective method for waterproofing wood. Stains penetrate the wood, both enhancing its color and working with the wood’s grain. Stain also provides protection against UV rays, making it ideal for outdoor wood surfaces such as fencing, siding, shingles, outdoor furniture, railings, and decks.
While stain and sealant combos are generally more expensive, they offer a variety of colors often in wood tones like brown, tan, and red. Some products even include mold and mildew blockers, simplifying maintenance. This convenient approach adds color and protection in one application.
However, some stain and sealer combinations are too potent for indoor use. If you plan to use them indoors, carefully read the label to guarantee suitability. Alternatively, you can purchase stain and sealant separately and apply them in two separate steps for more control over the process.
Laminate

If you prefer not to treat wood floors, waterproof laminate flooring is a great alternative. It’s easier to maintain and offers a lifespan similar to real wood. Unlike wood, waterproof laminate doesn’t require sealing. However, it is suitable only for indoor use.
Typically, waterproof laminate costs between $2-3 per square foot, which is about the same as standard laminate flooring. For example, covering a 1,500 square foot area will cost between $3,000-4,500 for supplies.
Waterproof with Wood Oils
Wood oil options come as pre-blended, or you can mix your own. Gather the below supplies to waterproof wood with wood oil.
Tools Needed
- Tung, linseed, or Danish oil
- 400-grit sandpaper
- Tacky cloth
- Rags
- Gloves
How to Waterproof with Wood Oils
Follow the below steps to seal wood with a hand-rubbed oil finish.
1. Mix the Oil

First, remove any dirt or residue from the wood. Let the wood dry before moving on to the next step. When ready, stir oil in the can or in a separate container, making sure not to shake the product.
2. Apply Oil on the Wood

Prep the surface by sanding with 400-grit sandpaper. Sanding helps to open the wood grain. Then wipe the surface with a tacky cloth to remove any dust created while sanding. With an oil-damp cloth, apply the oil into the wood. Use a dry cloth to wipe up pooled oil, massaging oil in areas that didn’t receive a thorough coat.
3. Let the Wood Dry

Place oily rags in a bucket of water, as they can generate heat as they dry, potentially causing fires. Allow the furniture to dry either overnight or as per the instructions. You can hang the rags separately later to dry. Once dried, you can dispose of the rags without risk, but do not reuse them.
4. Apply an Additional Coat

If you’d like to add another coat of wood oil, sand the piece again, then use tacky cloths to remove any dust. Reapply another coat, again waiting a day or following the instructions to let the oil dry. Typically two coats of wood oil is enough. Wait three days before using the wood furniture or placing anything on top of it.
Waterproof Wood with Sealant
When waterproofing wood with sealant, aim to complete the job around room temperature, ideally between 65 to 75 degrees. Gather the below supplies to get started.
Tools Needed
- Sealant
- 400-grit sandpaper
- Tacky cloth
- Gloves
- Paint brush
- Mineral spirits or paint thinner
How to Waterproof with Sealant
When applying sealant, never shake before applying as this creates air bubbles that can remain on the wood, even after the sealant dries. Instead stir the oil in a separate container. Follow the below steps to waterproof wood with a sealant.
1. Apply the Sealant on the Wood

First clean the wood, then allow the wood to dry. Then prep the surface by sanding with 400-grit sandpaper. Sanding helps to open the wood grain. Next, wipe the surface with a tacky cloth to remove any dust created while sanding. When ready, brush the sealant onto the wood surface. If you can’t complete this job outdoors, make sure you’re working in a well-ventilated area.
It’s important to note that the technique used to brush on sealant is different from painting. Begin at one edge of the wood and apply the finish in one long stroke along the entire length. As you reach the end of the stroke, apply more pressure with the brush. Repeat this step, slightly overlapping the first stroke. If you miss a spot, wait until the next coat to address it.
2. Let the Wood Dry

Allow the furniture to dry based on the product instructions. Some sealants dry within two hours while others can take up to 24 hours.
3. Sand and Apply a Second Coat

For additional coats, typically either two or three total for sealant, resand the piece and use a tacky cloth to wipe down the furniture. The goal is to form a seal with none of the wood grain exposed. Reapply the sealant using the same method outlined in step one. Plan to reseal furniture when you notice the sealant coating starting to wear off, around every two to three years or so.
4. Clean Tools

For water-based sealants, clean tools with soap and water. For oil-based sealants, clean tools with mineral spirits or paint thinner. Wait three days before using the wood furniture.
Waterproof Wood with Stain and Sealer
To waterproof wood with a pre-mixed stain and sealer, gather the below supplies.
Tools Needed
- Stain and sealer
- Pressure washer
- Sander
- Five gallon bucket or large container
- Paint brush or roller
- Gloves
- Mineral spirits or paint thinner
How to Waterproof with Stain and Sealer
When applying stain and sealant to a large area such as a deck, it can be helpful to clean it with a pressure washer before applying any product. If power washing a deck, it can take up to 48 hours for the wood to dry completely. Follow the steps below to learn how to seal wood for outdoor use with a combined stain and sealant.
1. Mix the Stain and Sealer

Combine the stain and sealer into a large container, such as a five gallon bucket, and stir to create a consistent color. Stains can contain a lot of pigment, so stir thoroughly to mix the product well.
2. Apply a First Coat

Using the brush or roller, apply a thin coat to a clean and sanded area. Work quickly and carefully so you always work with a wet edge.
3. Let the Wood Dry

Water-based stain sealers take one to two hours to dry. Oil-based stain/sealers take anywhere between two to four hours to dry.
4. Apply a Second Coat

Once dried, brush or paint a second coat of stain and sealant, keeping the coat thin and light. Two coats are typically sufficient. Wait two to three days before using your newly waterproofed wooden surface.
5. Clean Tools

Clean water-based stains and sealers with water and soap. Clean oil-based stains and sealers with mineral spirits or paint thinner.
For Indoor Wood, Laminate
As mentioned previously, waterproof laminate is a great and low-maintenance option to waterproof floors. Waterproof laminate installs like any other laminate, clicking and locking into place. Some laminate guarantees even offer scratch protection.
Frequently Asked Questions
How do you seal raw wood for outdoor use?

A great way to seal raw wood for outdoor use is with a combination stain and sealer. The stain will protect the wood from harmful UV rays and the sealant protects wood from water damage or warping.
How do you keep untreated wood from rotting?

Preventing untreated wood from rotting can pose a challenge, but you have a couple of options. First, choose rot-resistant wood, such as cedar, redwood, cypress, or teak. Additionally, when using wood for outdoor projects, keep it elevated. For example, consider placing wood on concrete blocks when constructing a deck or garden bed.
Does waxing wood waterproof it?

Waxing wood provides some level of water resistance, however waxing alone doesn’t waterproof wood. It’s recommended to add a sealer to protect wood against water damage, especially if it’s exposed to prolonged or heavy moisture.
What is the cheapest way to protect wood outside?

Adding wood oil or a layer of outdoor paint is a cost effective method to protect wood from the elements. Note that while both of these methods are cost effective, they will require more frequent application as compared to applying a high-quality wood sealer every three years or so.
When it comes to maintaining wooden areas in your home, it’s crucial to keep them in top shape. If you need a hand, look no further than home improvement services on Taskrabbit! Your local neighborhood Tasker comes ready to help waterproof any wooden area in your home. Whether it’s sealing your deck, protecting your hardwood floors, or maintaining your wooden furniture, Taskers are equipped to handle the job efficiently and professionally. Don’t wait until it’s too late—schedule a Tasker today to guarantee your wooden surfaces stay beautiful and protected for years to come!