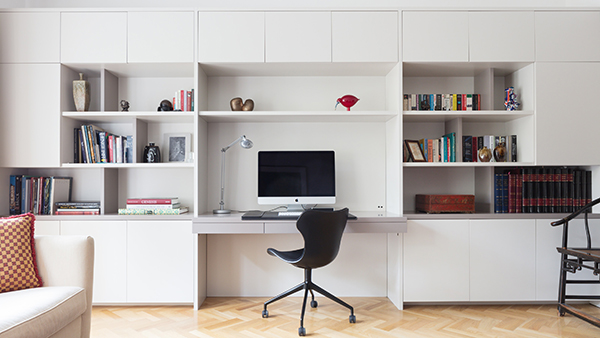
Cabinet installation is a great way to transform your kitchen, and it’s definitely something you can DIY if you put in the time to learn what’s involved. Not only will installing kitchen cabinets allow you to add new storage to your space, but it can also be a practical way to give your daily cooking area a stylish makeover.
When you’re trying to learn how to install kitchen cabinets, it’s essential first to understand the cost, time, and difficulty level (which we’ve outlined below):
Difficulty: Moderate
Cost: $100 – $200 per linear foot (plus more if you hire help)
Time: 8-10 hours in an average-sized kitchen
Tools and Materials for Installing Kitchen Cabinets
Before diving into the cabinet installation process, you’ll want to gather the right tools and materials so you can easily access them during the process. Here’s what you’ll need:
- Laser level
- Tape measure
- Pencil
- Chalk line
- Drill, driver, and bits
- Screws
- Stud finder
- Hole saw
- Ratchet clamps
- Filler strips
- Cabinet trim
- Shims (thin strips of material used to wedge beneath and align parts)
- Cabinets (or cabinet pieces to assemble)
- Crown molding (if needed)
Before Getting Started
As always, you should keep safety in mind when learning how to install kitchen cabinets. Here are some top considerations:
- Wear safety gear, including goggles or glasses, to protect your eyes from debris.
- Before you drill, check to make sure there are no electrical wires or water pipes behind the wall.
- Take extra care when working with power tools, as they can be dangerous if mishandled.
- Make sure you can lift your cabinets into place. Heavy lifts can strain muscles or injure shoulders, and you could get seriously injured if a cabinet falls on top of you.
- As such, make sure you have at least one person to help you!
Before you start replacing kitchen cabinets, you’ll also want to take measurements of your space and identify any areas that might become problematic. This can happen when floors aren’t 100% level, and walls aren’t 100% flush (or perpendicular). These types of imperfections are more common than you think, so be prepared by having shims that you can use to level out the cabinets where and when it becomes necessary. One wrong measurement can ruin your project, so make sure you’re exact with your measurements before buying and assembling the cabinets.
How to Install Upper and Base Kitchen Cabinets
Now it’s time to start installing base cabinets and high cabinets! Carefully follow the steps below to ensure the project gets completed properly.
Step 1. Remove Your Old Cabinets

If you haven’t done so already, it’s time to remove your current cabinets! Doing so will help you understand how you’ll hang the new ones. With an extra set of hands, unscrew them from the wall, and ease them down.
Step 2. Inspect Your New Cabinets

This is an essential step before anything else. Make sure you have all the pieces necessary to assemble your cabinets if they aren’t assembled already, and check all the surfaces to make sure there are no blemishes. If you’re going to paint them, now would be a good time.
Step 3. Locate High Spots On The Floor & Other Inconsistencies

Do an initial walkthrough of the area where you’ll be installing your cabinets. Using a laser level placed on top of an eight foot 2×4 board, check to see if the floor, wall edges, and ceiling edges are vertically and horizontally level. It’s best to assume that you’ll have a high spot on your floor or potentially a low spot on your ceiling, and it’s essential that you use these as reference points when installing your cabinets.
When the floor is uneven, it’s far easier to use a shim to elevate the base cabinet than it is to even out your floor. If your ceiling is crooked up above, you’ll also want to start your installation at the lowest point so your ceiling doesn’t run out of space for your cabinets.
Furthermore, you’ll want to find any bumps or humps in the wall that will get in the way of installing your cabinets in a flush manner. You can again use shims if necessary, but take care to ensure that all your cabinets will be aligned once you hang them.
Step 4. Mark The Wall

Once you’ve identified uneven spots, mark the wall with a pencil or chalk line to take note of where these spots are and where you might need to use shims to ensure your cabinets are level. Then mark where you’ll actually hang your cabinets—you can do this by marking where the base of them will end up.
You can also mark center points if your cabinets need to align with a particular fixture in your room (like a window). Be thorough during this step, as your wall markings will have a big impact on how the project proceeds.
Step 5. Locate The Wall Studs

Using a stud finder, locate the studs in the wall where you’ll be drilling, and mark them with a pencil or chalk line.
Step 6. Assemble The Cabinets
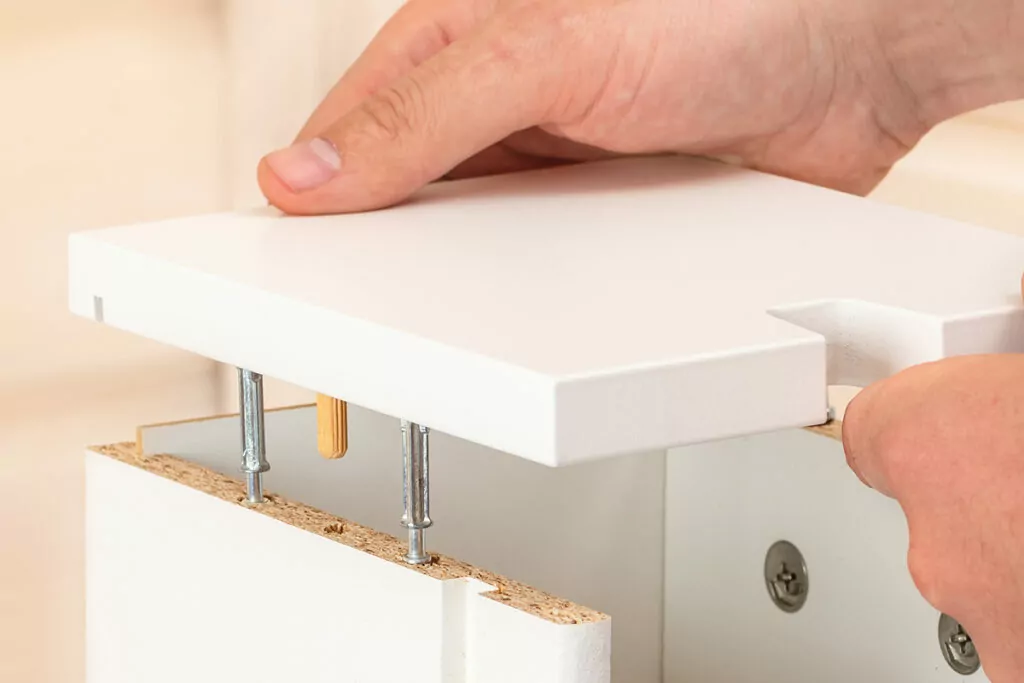
If your cabinets are not yet assembled, follow the manufacturer’s instructions to do so. Make sure that all sides are connected properly and make a 90-degree angle against each other so that you won’t run into any alignment issues caused by anything other than the walls, ceiling, or floor.
Finally, if the cabinet doors are already attached, remove them by unscrewing the hinges from the main cabinet unit. This will lighten the load and prevent the doors from swinging open as you mount them!
Step 7. Hang The Upper Cabinets

Now that your wall is all marked, it’s time to learn how to hang cabinets! You’ll first want to drill a 1×4 inch ledger board into the wall studs so that the top of it matches the markings where the bottom of your high cupboards will be. You can also rest the cabinets on the ledger board to help ease the installation process.
Next, you can start hanging your first cabinet! You can drill pilot holes into the back of the cabinet at the proper spots where they will align with the wall studs, then mount them to the wall with your drill and screws. You don’t need to tighten the screws fully yet—just make sure the cabinet can hang. If you’re hanging it on an uneven spot on the wall, you can use a shim in the back to make it hang flush. When hanging your first cabinet, it’s also usually best to start in the corner.
For the second cabinet, lift it to align perfectly in the front with the cabinet already attached to the wall. Use a clamp to connect the two along with shims in the back if necessary. Then mount the second cabinet to the wall. Repeat this process with subsequent cabinets, moving outward from the corner.
Step 8. Install The Base Cabinets

Unless you decided to start at floor-level first, it’s now time to start installing base cabinets. Again, you’ll want to make sure to start your installation at the highest point on your floor (assuming it isn’t perfectly even). Place the cabinet without attaching it, and use shims to raise any dipping side to be perfectly level and align with any marks you’ve made on the wall.
Once your base cabinet is in place, attach it to the wall. Repeat the process for any subsequent base cabinets, and ensure that each one is level, aligns with your first one, and isn’t showing any gaps. If you do have gaps, use filler strips to cover them.
Step 9. Adjust The Drawers

If any of your cabinets have drawers, put them in, and then test to see if they move smoothly. If they don’t, it may mean the cabinets aren’t level on either the X or the Y axis. Use a level to double check that the cabinet bases are perfectly horizontal, and test the drawers along their track once again.
Step 10. Install The Doors

Once the drawers are set, it’s time to tighten all the rear screws thoroughly before replacing the doors. Screw the doors and hinges back onto the cabinets, assure they can open and close properly, and add any trim or crown molding to finish off the look.
Then you’re all set—you’ve just learned how to hang cabinets! Now you can add under-cabinet lighting or start filling them with dishes.
Need Help?
While DIY cabinet installation can be a fun and rewarding project for those who are carpentry inclined, it can also be time-consuming and challenging for those without any building experience. If you decide you want help, Taskers can complete your installation efficiently and ensure your cabinets are perfectly aligned and secure. Hire a Tasker today!