Leaky shower heads—you know, those pesky drips that sound like a tiny tap-dance party in your bathroom—are a common headache for many homeowners. Whether it’s caused by worn-out rubber washers, mineral buildup, or an old shower cartridge, these leaks can turn your dripping shower head into a total water waster (and make your water bill skyrocket). The good news? With just a little bit of help from this article, your shower leaking problem will be a thing of the past. Soon, you could call yourself a licensed plumber. Ready? Let’s go.
Why is My Shower Head Leaking? Main Causes
Picture this: You’re all set for a refreshing shower, but instead of a gentle stream, you’re greeted by a leaky showerhead. What gives?
Well, the main culprits are often the shower valve, that part of the faucet that controls the water flow, or a clogged shower head that can accumulate mineral deposits faster than you can say drip-drip-drip. Sounds like a daunting DIY job, but the solution for how to fix a leaky shower head is way easier than you think—no plumber necessary!
So, prepare to say goodbye to this pesky problem and read on to learn how to stop your shower head from leaking like a professional plumber.
Fixing the Shower Mixer Valve
To fix your shower mixer valve, you’ll need the following materials:
- A Phillips head screwdriver
- An adjustable wrench
- A replacement flow cartridge
Now that you have your materials, read ahead for the steps to start fixing your shower mixer valve.
1. Shut the Water Off

First things first: You need to find the water shut-off valve. Check behind the shower panel or even inside the faucet itself—some shower faucets come with built-in shut-off valves that you can twist with a screwdriver. Now, not all showers come equipped with these shut-off valves, in which case, you’ve got a backup plan: the main shut-off valve. Find it, give it a twist to shutoff, and voilà.
2. Remove the Handle

Now, it’s time to tackle that faucet handle. Depending on the brand, you can pry off the handle with a small flathead screwdriver, or there might be an Allen bolt hiding underneath that needs unscrewing. Keep your eyes open for a tiny hole on the underside of the handle—that’s your clue! Once you’ve figured that out, grab your Philipp’s head screwdriver and unscrew the outer plate.
3. Remove the Cap

With your trusty screwdriver in hand, now you’re going to want to remove the cap from the flow cartridge. Grab your wrench, loosen the outer ring, and watch that cartridge come out like a champ.
4. Put in the New Cartridge
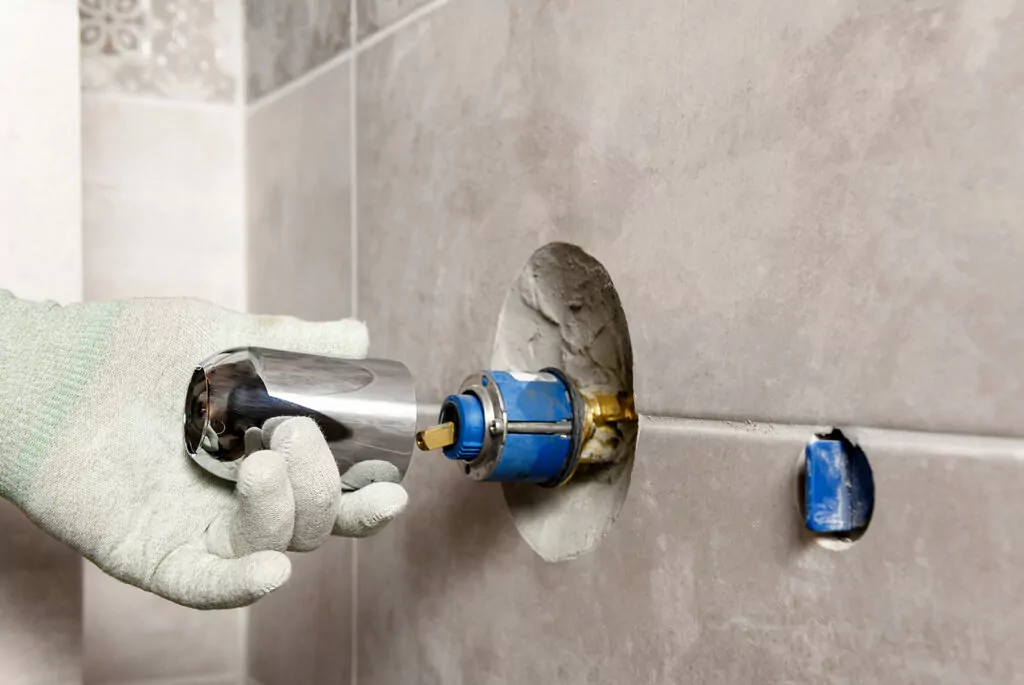
Finally, it’s time to pop in your shiny new cartridge. Make sure the three holes line up perfectly, give it a gentle hand-tightening, and then secure it snugly with the wrench. Hot tip: Be gentle, you don’t want to over do it!
5. Put the Cap On
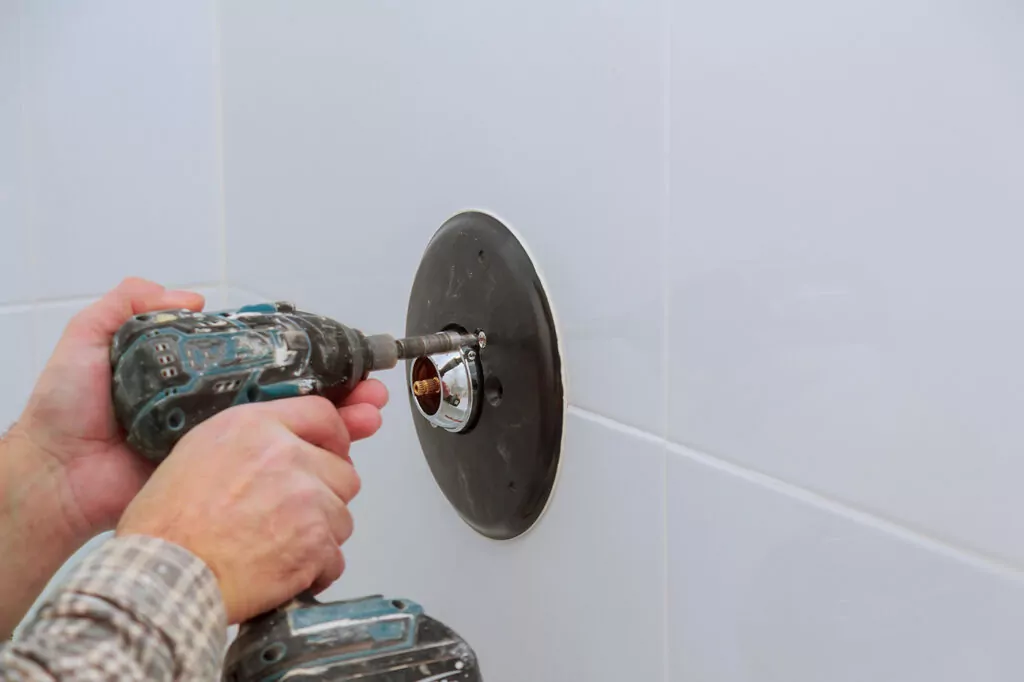
Screw that cap back into place, pop the cover back on, and get ready for the big reveal.
6. Turn the Water On

With everything back in order, it’s time to turn the water supply back on and test your handiwork. Keep an eye out for any leaks or drips—if everything looks good, congratulations, you did it!
Fixing the Shower Head
To fix your shower head, you’ll need the following materials:
- An old toothbrush or small scrubbing brush
- White vinegar
- Thread-sealing tape
- Pliers
- A bucket or container to soak the showerhead in
- A towel or cloth
- Replacement washers
Now that you have your materials, read ahead for the steps to start fixing your shower head.
1. Shut the Water Off

First, make sure the shower handle is turned off, then turn the shower head counterclockwise off of the shower arm.
2. Remove the Shower Head

Older showers may require a little more muscle, so you’ll want to cover the shower head with a soft cloth (you don’t want to damage the finish!) and use pliers to release it.
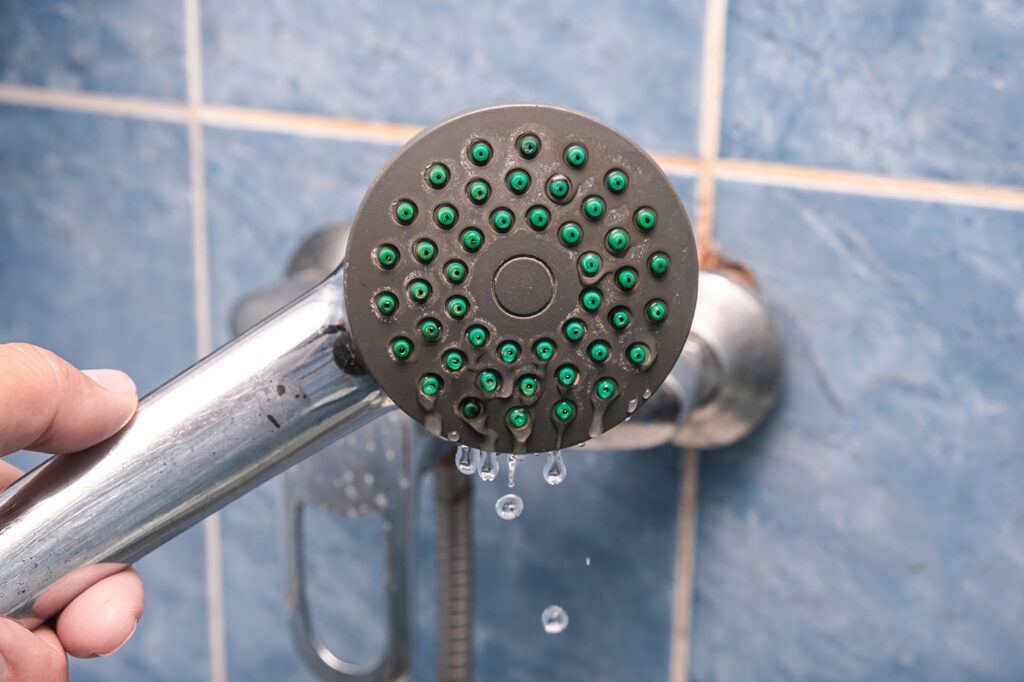
3. Clean the Shower Head

Your shower head will have rubber O-rings and washers (and, depending on your shower head, maybe some other parts, too). Make sure those are not worn, damaged, or blocked with any residue. If that’s all good, then you’re free to move on to the gunk, but don’t be alarmed—it’s just hard water deposits. The secret weapon you’ll need is some white vinegar. Pour that into your bucket or container, and let it soak overnight. When you wake up, grab your toothbrush and scrub away any of the remaining residue.
4. Wrap the Pipe Threads

Before you start wrapping, you’ll want to remove any old thread-sealing tape by peeling it away and sweeping any left-over stickiness with your brush. Once it’s clean, it’s time to start wrapping with fresh tape—wrap the tape around the threaded tip of the pipe stem snugly.
5. Reassemble the Shower Head

Now, it’s finally time to reunite your shower head where it belongs so you can finally enjoy that flow of water! Thread your shower head back onto the shower arm and just give it a tightening by hand, no tools needed. Once it’s snug, turn on the faucet to make sure the water is streaming the way it should. If it doesn’t, you may need to install a shower head replacement. If it does, then you’ve just learned how to fix a leaky showerhead. Bravo!
Frequently Asked Questions
Why is my shower head spitting water?
In many cases, a shower head that spits water is the result of built-up limescale.
How much does it cost to fix a leaking shower head?
Depending on the severity of the issue, you can expect to pay between $50-150 to fix a leaking shower head.
How do I know if my shower head is bad?
One of the top telltale signs that your shower head isn’t great is if you notice a clear change in water pressure. If the pressure seems to have a mind of its own and fluctuates or has gotten weaker over time, it’s likely you need a new shower head.
Why does my shower leak only sometimes?
There could be a few reasons! It could be an internal part that needs replacing (like an old cartridge) or maybe your wall unit seal is broken. Whatever the problem, a Tasker can help you out.
Need Help With Fixing a Leaking Shower Head?
Thanks to these tips (and maybe a trip to the hardware store), fixing a leaking shower head isn’t so bad! But sometimes, you need a little more muscle with a professional plumber. Whether that’s getting help with smaller home improvement projects like fixing a leaky bathtub or kitchen faucet, not-so-enticing tasks like unclogging a shower drain, or a bigger job like remodeling your bathroom, Taskrabbit’s plumbing services are your answer.