Mold is an unpleasant aspect of home ownership that not all homeowners experience but for some, it can cause everything from headaches to putting a hurt on your wallet too in order to remediate it. Unfortunately mold can grow and spread throughout your home quickly, which is why it’s so important to address at the first sign.
In the interest of helping homeowners who might be seeking to remove the mold themselves, we’ve put together this complete guide to DIY mold removal to help steer you in the right direction. Let’s dive in!
Table of Contents:
- Getting Started with Your DIY Mold Removal Project
- How to Clean Mold Off Walls
- How to Easily Remove Mold from Wood
- How to Remove Mold From Bathroom Ceilings
- Mold Removal Frequently Asked Questions
- Tips to Prevent Mold Growth
Getting Started with Your DIY Mold Removal Project
As you’re getting started on your mold removal journey, here are few important steps to follow.
What Causes Mold?
Mold can grow in many different areas of your home for several reasons but is primarily caused due to warm and humid environments.
The leading causes of mold growth are:
- Excess moisture: Whether caused by leaks, temperature or the climate in general, a combination of warmth and moisture tends to produce mold. Without proper ventilation, it condenses on surfaces, promoting mold growth.
- Poor ventilation: Inadequate airflow traps humidity, causing condensation on ceilings.
- Warm temperature: Mold thrives in warm environments throughout the home, particularly in bathrooms where these conditions are exacerbated by showers and baths.
- Leaks: Pipe, window, or roof leaks add moisture, creating damp conditions for mold.
- Lack of sunlight: Limited natural light slows drying, allowing moisture to linger and mold to develop.
Addressing these causes by improving ventilation, fixing leaks, and maintaining a consistent cleaning routine can help prevent mold growth.
Identify the Type of Mold
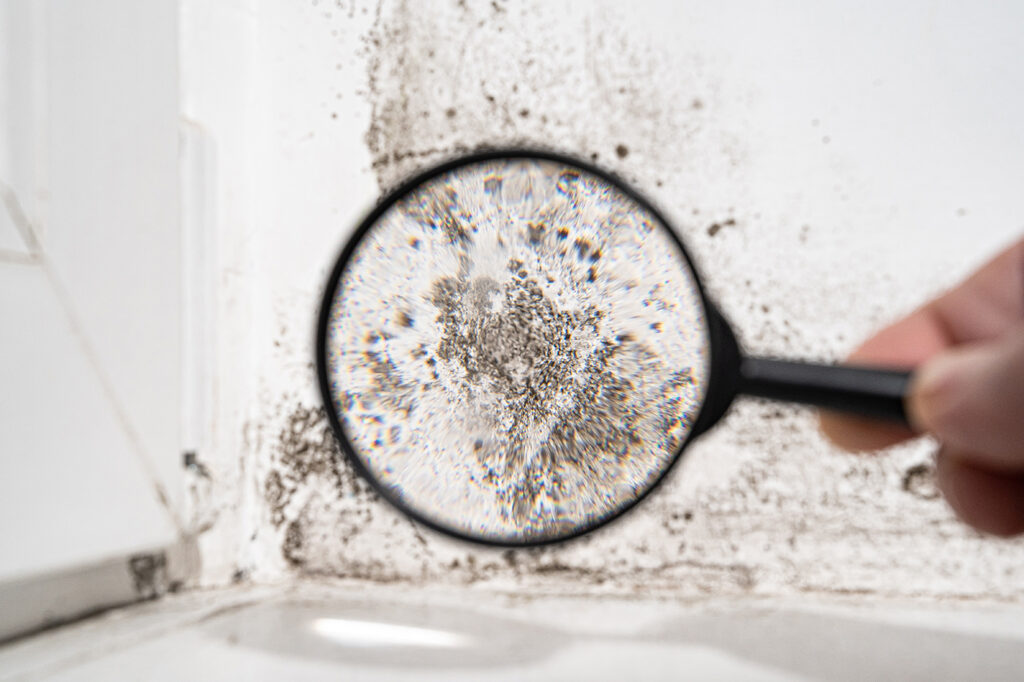
People often use the terms mold and mildew interchangeably, but they are two different types of fungi with distinct characteristics. Mold typically has a fuzzy or slimy texture and can appear in various colors, including black, green, blue, or red. It grows in damp, dark areas and can penetrate porous surfaces. On the other hand, mildew is a mold that typically appears as a powdery substance and is usually white or gray. It thrives on moist surfaces, like in bathrooms and other humid environments.
Types of Mold:
- Alternaria (Alternaria alternata): Alternaria is a common outdoor mold that can also be found indoors. It is often black or dark green in color and can cause respiratory issues in those sensitive to it.
- Aspergillus (Aspergillus spp.): Aspergillus is a widespread mold that comes in various colors, including green, yellow, or white. It can cause allergic reactions and respiratory infections in humans.
- Mucor (Mucor spp.): Mucor is a fast-growing mold that is typically white or gray. It thrives in damp environments and can cause respiratory issues, particularly in people with weakened immune systems.
- Serpula (Serpula lacrymans): Serpula, also known as dry rot fungus, is a destructive mold that can cause significant damage to wood structures. It typically appears as a reddish-brown growth.
- Black Mold (Stachybotrys chartarum): Commonly known as toxic black mold, Stachybotrys chartarum can pose serious health risks, particularly to individuals with weakened immune systems or respiratory conditions. It typically appears as dark greenish-black patches and thrives in damp, humid environments. Exposure to black mold spores can cause respiratory issues, allergic reactions, and even neurological symptoms in some cases. Proper identification and removal of black mold are crucial for maintaining a safe and healthy home environment.
Tools to Remove Mold
To get rid of mold and effectively kill mold it, you’ll need to gather the following tools and materials:
- Gloves (rubber or nitrile)
- Protective eyewear
- Sponge or soft-bristled brush
- Spray bottle
- Cleaning solution (white vinegar, hydrogen peroxide, or a DIY mixture)
- Warm water
- Microfiber cloths or rags
- Stepladder
- Plastic sheeting or drop cloths
The right tools and cleaning solutions are required to tackle the mold problem safely and efficiently. Gloves and eyewear will protect you from direct contact with mold spores and harsh chemicals. A spray bottle allows you to apply the cleaning solution evenly over the affected area, while a sponge or soft-bristled brush helps scrub away stubborn mold growth.
Household Substances for Mold Removal
Many natural and readily available items have antifungal and antimicrobial properties that can help kill mold spores and remove surface mold growth. Before reaching for harsh chemicals, consider these best mold removers for bathroom ceilings made from pantry staples:
- Vinegar: White distilled vinegar is an effective mold killer. How to use vinegar to kill mold: Spray undiluted vinegar directly on the moldy areas, let it sit for 15 minutes, then scrub mold off. Give the area a light vinegar spray, and allow it to air dry.
- Baking soda: Baking soda can help remove mold by absorbing moisture and scrubbing away spores. Mix baking soda with warm water, spray on mold, and scrub.
- Hydrogen peroxide: A 3% hydrogen peroxide solution can kill mold. Spray it on the affected area, but test first to ensure it doesn’t cause discoloration.
- Tea tree oil: This essential oil has antifungal properties. Mix a teaspoon of tea tree oil with a cup of water, spray on mold, let it dry an hour, then wipe clean.
- Lemon juice: Lemons’ high acidity can kill mold spores. Spray lemon juice on the moldy area, let it sit for 10-15 minutes, then wipe away.
Take Precautions
It’s important to keep in mind that mold can be toxic so outside of utilizing personal protective equipment, if the spread of mold is prevalent within your home you may need to consult with a professional mold remediation company.
How to Remove Mold From Walls
When it comes to removing mold from walls, the process differs between dealing with concrete vs. painted walls or drywall. Because of concrete’s porous nature, mold can penetrate deeper into it, making it more challenging to eradicate completely. Unlike painted walls or drywall, where surface treatment may be sufficient, concrete walls may require more aggressive cleaning methods and specialized products to remove mold and prevent its regrowth so be sure to evaluate which kind of wall you’re working on before beginning. Learn more about cleaning mold from various types of walls here.
1. Prepare with Material and Solution
Before starting the cleaning process, gather the necessary materials, including protective gear—such as rubber gloves, goggles, and a mask—plus cleaning products specifically formulated for mold removal from concrete surfaces.
2. Rinse the Area With Solution
Thoroughly wet the affected area of concrete with your chosen cleaning solution, making sure to cover the mold-infested surface completely. Let the solution penetrate the pores of the concrete for a few minutes to help loosen the mold and make it easier to remove.
3. Scrub the Surface
Using a stiff-bristled brush or scrubbing pad, scrub the moldy area of the concrete wall vigorously to dislodge and remove the mold. Work in small sections, applying firm pressure to ensure thorough cleaning.
4. Rinse and Repeat
After scrubbing, rinse the cleaned area of the concrete wall thoroughly with clean water to remove any remaining mold spores and cleaning solution residue. Repeat the cleaning process as necessary until all visible mold has been removed.
5. Dry the Surface
Once the mold is gone, allow the concrete wall to dry completely. Use fans or dehumidifiers to speed up the drying process and prevent moisture from accumulating, which could lead to future mold growth.
6. Apply a Mold Inhibitor
Consider applying a mold inhibitor or sealer designed for concrete surfaces to help prevent mold growth in the future. Read and follow the manufacturer’s instructions carefully for best results.
How to Remove Mold from Wood
Getting started with removing mold from wood is straightforward. Expect the total time of the project to take three hours, with an intermediate skill level and a mere $0-15 in supplies. Note that the safe removal of mold on wood is critical so spores don’t spread on other surfaces through the air. This precaution is particularly important to avoid triggering allergies or respiratory issues for both yourself and others in your home. Follow the below steps for more on removing mold from wood.

Now that you’re prepared, follow the steps below to remove mold from wood or wood furniture.
1. Use Protective Gear
Make sure you’re wearing old clothing for the job as well as a mask that covers your nose and mouth along with gloves and safety goggles.
2. Vacuum the Area
Next, vacuum the area with a vacuum that has a HEPA filter to suck up any loose mold spores. HEPA filters can trap particles as small as 0.3 microns, with an efficiency of up to 99.97%. Run the vacuum over the affected area and take the vacuum outdoors to dispose of its contents. When you empty the vacuum, make sure the vacuumed material is tightly sealed in a plastic bag before tossing in the garbage so no spores can escape.
3. Clean Off the Mold
The first way to try to clean mold is with a cleaning solution of dish soap and warm water. Simply add a teaspoon of soap to a spray bottle with warm water and shake to mix. Spray the moldy area and use a soft-bristled brush to scrub the mold, sponging up excess liquid as you clean. Dry the surface completely with a towel.
If that doesn’t work, up the ante with distilled white vinegar. Vinegar is an effective mold treatment that kills more than 80% of mold species. Combine equal parts vinegar with warm water in a spray bottle and spritz the solution onto the mold stains. Let the solution sit for one hour, then wipe the surface with a moist cloth, followed by a dry towel.
If the mold persists, it’s time to bring out another option for what kills mold: borax, a safer alternative to bleach. Combine one tablespoon of borax with a cup of water and apply the solution to the mold using a soft-bristled brush. Thoroughly scrub away the mold, leaving the borax solution on the wood. Resist the urge to sponge up excess liquid, aiming to retain as much solution in the wood as possible to deter future growth. Run a fan or dehumidifier in the room to make sure the surface dries completely with the borax still under the surface.
It’s important to note that while bleach or a bleach solution is a highly effective way to kill mold, it should be avoided on wood surfaces, especially if they are sealed. This is because the chlorine in bleach cannot penetrate wood; only the water portion of the bleach is absorbed. The chlorine part of bleach is what kills mold. Although mold may seem eradicated, it is likely to persist and resurface in a few months if treated with bleach.
4. Sand Wood If Necessary
If the previous steps fail to resolve the issue, you have one last tool in your arsenal: sanding. Use 100-grit sandpaper to rub the affected portion, while trying not to sand away too much of the surrounding areas. Follow up by repeating step two, vacuuming the area with a HEPA filter to eliminate dust and any loosened spores.
Learn more detailed information about how to remove mold from wood here.
How to Remove Mold From Bathroom Ceilings
Properly cleaning mold off the bathroom ceiling, bathroom walls, or shower curtain requires careful preparation and the right techniques. Here are the steps to effectively remove mold growth and prevent future issues:

1. Get Your Gear
Before starting, gather the necessary protective gear, such as rubber gloves, goggles, and a respirator or mask to avoid inhaling mold spores. Also, have a scrub brush, cleaning cloths, and a plastic sheet or drop cloth to cover surfaces and contain the mold.
2. Prepare the Cleaning Solution
Mix a solution of one part bleach and three parts water in a bucket or spray bottle. Alternatively, you can use a borax solution or undiluted white vinegar—effective natural mold removers.
3. Apply the Solution
Generously apply the cleaning solution to the affected area, ensuring it saturates the mold growth. Allow it to sit for 10-15 minutes to penetrate and kill the mold spores.
4. Scrub and Wipe
Using the scrub brush, vigorously scrub the moldy areas to remove as much growth as possible. Wipe away any remaining residue with clean cloths or paper towels.
5. Rinse and Dry
Thoroughly rinse the area with clean water to remove any remaining cleaning solution or mold particles. Use fans or dehumidifiers to ensure the area dries completely, as moisture can lead to mold regrowth.
6. Treat and Prevent
Once dry, apply a borate-based solution or mold-resistant primer to prevent future mold growth. Fix any moisture issues, such as leaks or poor ventilation, to stop mold from returning.
It’s important to note that if the mold growth covers an area larger than 10 square feet, it’s best to seek professional mold remediation services, as extensive mold infestations can pose health risks and may require specialized equipment and techniques for safe and effective removal.
Want to know more? Read about these important cleaning scenarios you might not have considered.
Mold Removal FAQs
Is bleach or vinegar better to kill mold?
Both bleach and vinegar can effectively kill mold, but they have different properties and considerations. Bleach (sodium hypochlorite) is a strong disinfectant that can quickly kill mold on non-porous surfaces. However, it can produce harmful fumes and may damage some materials. Vinegar (acetic acid), on the other hand, is a natural and safer alternative. It may take longer to kill mold compared to bleach but is non-toxic and safe for use on various surfaces. Ultimately, the choice between bleach and vinegar depends on personal preference, safety considerations, and the type of surface being treated.
How do you kill black mold on walls?
Killing black mold on walls requires thorough cleaning and disinfection. Begin by wearing protective gear such as gloves, goggles, and a mask to minimize exposure to mold spores. Scrub the affected area with a solution of water and detergent or a mixture of vinegar and water. For stubborn black mold, consider using a commercial mold remover specifically designed for black mold. After cleaning, ensure the area is completely dry and well-ventilated to prevent mold regrowth.
Is it safe to clean black mold yourself?
While it is possible to clean black mold yourself, it’s important to take necessary precautions to protect your health. Black mold can release harmful mycotoxins and spores into the air, which can cause respiratory issues, allergic reactions, and other health problems, especially for individuals with compromised immune systems. If you choose to clean black mold yourself, wear protective gear, work in a well-ventilated area, and follow recommended safety guidelines. If the mold infestation is extensive or you have underlying health concerns, consider seeking professional help.
How to clean mold off walls naturally?
Cleaning mold off walls naturally can be achieved using household ingredients such as vinegar, hydrogen peroxide, or baking soda. Create a solution by mixing equal parts vinegar and water or hydrogen peroxide and water. Alternatively, make a paste using baking soda and water. Apply the solution or paste to the moldy areas and scrub with a brush or sponge. Rinse the walls with clean water and dry thoroughly. These natural cleaning methods are effective for removing mold and are safer alternatives to harsh chemicals.
What’s the Difference Between Mildew and Mold?
Mildew is the most common type of mold found in homes. Mildew grows in warm, damp places like basements, laundry rooms, and shaded porches. Initially appearing as gray or white, mildew eventually transforms into black or brown. To determine whether a stain on wood is mildew or dirt, apply a cotton swab dipped in bleach to the stain. If the stain lightens or disappears within a couple of minutes, it’s likely mildew. If no change occurs, it’s probably dirt.
Can Wood Be Saved From Mold?
Yes, wood can be saved from mold. When it’s time for a deep clean, taking prompt and effective action can salvage the wood and prevent further mold growth. Follow the steps outlined in this guide for thorough mold clean up, and remember, the key is early intervention. By addressing the issue promptly, you can avoid a serious mold problem.
How to Prevent Mold Forming on Wood?
To prevent mold, immediately address any leaks in your home. If you can dry the area within a day or two, mold likely won’t grow. Additionally, minimize moisture and humidity by maintaining well-functioning gutters and a sound roof. Also make sure that the ground slopes away from your home’s foundation. Finally, verify that appliances are venting properly, and use exhaust fans and dehumidifiers as needed.
What Kills Black Mold on Wood?
Not all black mold is the dangerous variety. Stachybotrys chartarum, commonly known as black mold, is a greenish-black mold that thrives on wood, paper, and cotton. It produces toxins that can impact health, causing symptoms such as coughing, wheezing, and eye irritation. Dealing with this type of black mold is best left to professionals. However, if you notice mildew that has taken on a black hue, you can remove it by creating a mold treatment mixture of water and dish soap in a spray bottle and scrubbing the affected area. Wear safety goggles, rubber gloves, and a mask to minimize exposure.
Can Mold Affect the Structural Integrity of Wood?
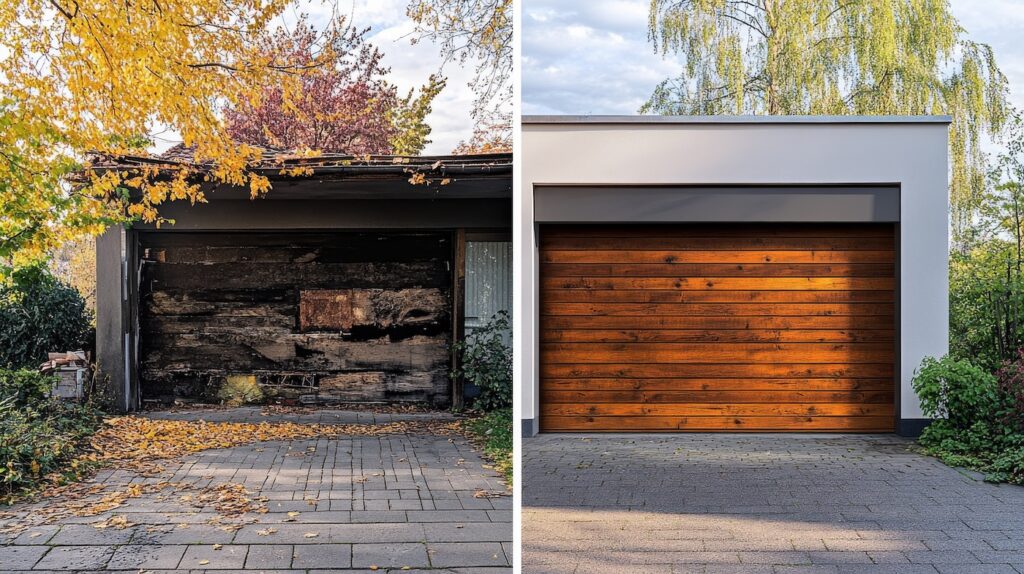
Yes, some mold can affect the structural integrity of wood. This mold is typically visibly fuzzy or slimy black or green mold and the drywall or wood underneath will be soft or crumble to the touch. This indicates irreversible rot and the damaged areas must be removed and replaced immediately.
Tips to Prevent Mold
A dose of prevention is worth a pound of cure! Here’s how to prevent a mold problem from overtaking your space.
- Keep the areas dry: Moisture is the primary culprit for mold growth, so regularly dry damp areas in your home, especially bathrooms, kitchens, and basements.
- Check for leaks: Regularly inspect plumbing fixtures, roofs, and windows for leaks or water damage and promptly repair them to prevent moisture buildup.
- Keep windows open: Proper ventilation is essential for preventing mold growth, so open windows and use exhaust fans in bathrooms and kitchens to improve airflow and reduce humidity levels.
- Use a dehumidifier: If your home tends to be humid, especially in areas like basements or attics, consider using a dehumidifier to maintain optimal humidity levels and prevent mold growth.
- Clean and maintain gutters: Clogged gutters can lead to water seepage into your home, creating ideal conditions for mold growth, so regularly clean and maintain your gutters to prevent water buildup.
- Use mold-resistant products: When renovating or remodeling, consider using mold-resistant drywall, paint, and insulation to minimize the risk of mold growth in your home.
- Remove excess indoor plants: While indoor plants can enhance air quality, they can also increase humidity levels, creating favorable conditions for mold growth. Limit the number of indoor plants, especially in areas prone to moisture.
- Monitor indoor humidity: Invest in a hygrometer to monitor indoor humidity levels and keep them between 30-50% to prevent mold growth. If humidity levels are consistently high, take steps to reduce them, such as using a dehumidifier or improving ventilation.
Need professional help with mold removal? Get deep cleaning support from a local tasker.

